Tapetowanie – Zaznaczanie linii pomocniczych na suficie i ścianach
Kąty, wnęki drzwiowe i okienne rzadko pozostają względem siebie w idealnym pionie. Zatem pierwszą czynnością podczas tapetowania ścian będzie narysowanie linii pionowej wyznaczającej brzeg pierwszego arkusza tapety. Zawieś pod sufitem ciężarek na posmarowanej kredą lince, po czym odciągnij ją lekko od ściany i puść, by zostawiła kredowy ślad. Na każdej ścianie wyznacz osobną linię i nieustannie sprawdzaj zgodność ułożenia arkuszy. Linie na suficie rysuje się przeciągając w równych odległościach posmarowaną kredą linkę od jednej ściany do drugiej i lekko ją odciągając, by zostawiła ślad. Punktem wyjścia dla tapetowania sufitu jest najczęściej linia równoległa do okna, dzięki czemu – podobnie jak przy malowaniu – będziesz się podczas pracy odsuwał od źródła światła.
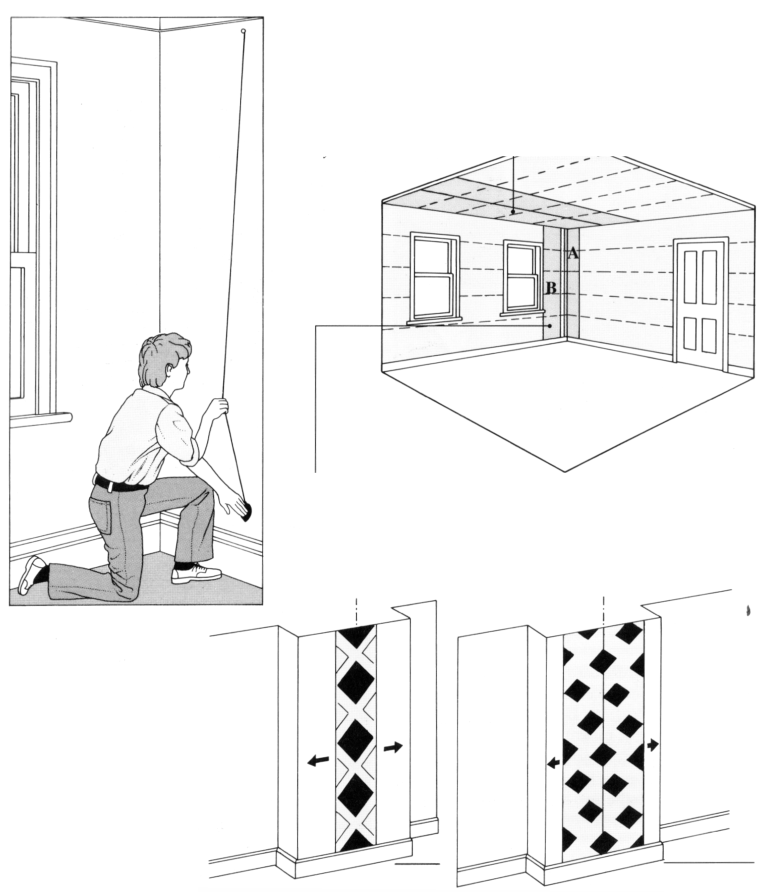
Wykorzystanie pionu na posmarowanej kredą lince
Kiedy podwieszony pion przestanie się kołysać, dociśnij koniec linki do ściany, a następnie lekko odwiedź i puść, by zostawiła kredowy ślad.
Gdzie zacząć tapetowanie sufitu?
Zacznij od pasa równoległego do głównego otworu okiennego. Narysuj pierwszą linię prowadzącą tak, by powstały pas był o około 5 cm węższy niż tapeta.
Od którego miejsca zacząć tapetowanie ścian?
Przesuwaj się w kierunku od linii A. Najpierw wyklej tapetą pierwszą ścianę boczną, następnie ścianę okienną, drugą ścianę boczną, wreszcie ścianę tylną. Możesz także rozpocząć od linii B, wytapetować całą ścianę okienną, potem ściany boczne, a na koniec ścianę tylną.
Przewód dymowy kominka
Jeśli tapeta ma duże wzory, postaraj się umiejscowić wzór na środku występu (po lewej). Jeśli wzór nie jest symetrycznie rozmieszczony, zaznacz linią środek występu i po obu jej stronach naklej po arkuszu pełnej szerokości (po prawej).